

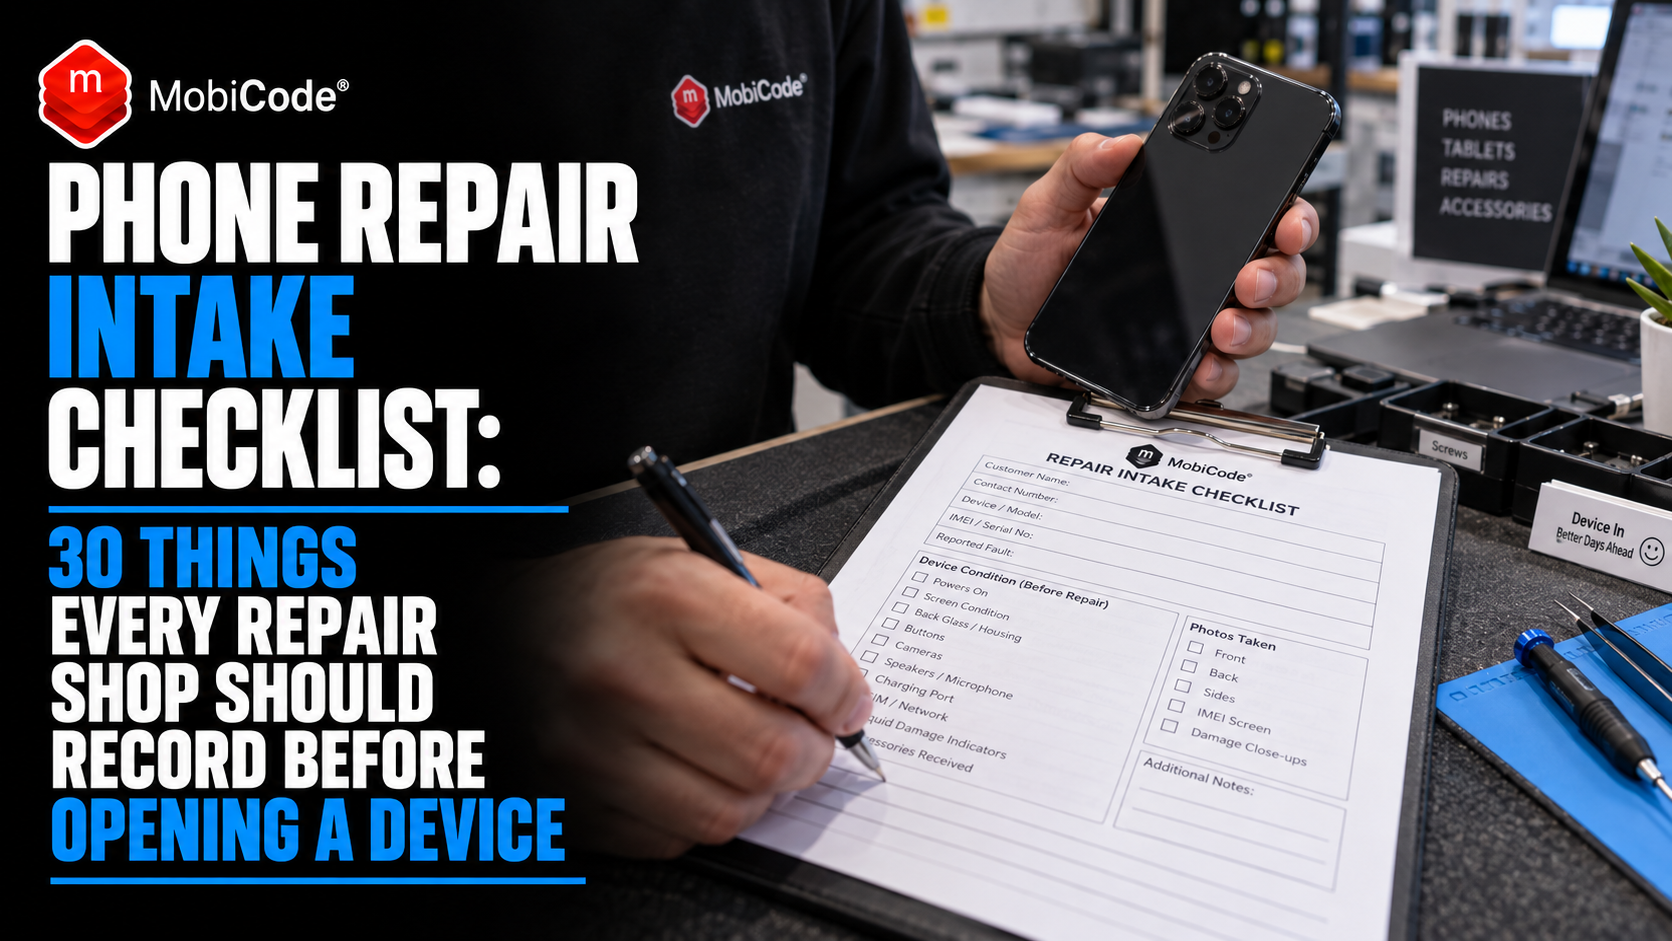
Phone Repair Intake Checklist: 30 Things Every Repair Shop Should Record Before Opening a Device
A good phone repair starts before the technician removes a single screw. First, the intake process should establish exactly which device has arrived, what the customer says is wrong, what damage already exists and which functions currently work.
Without that evidence, repair shops leave themselves exposed to one of the industry’s most frustrating disputes: “That wasn’t broken when I brought it in.”
More importantly, a proper phone repair intake checklist does much more than protect against complaints. It gives technicians better information, reduces wasted diagnosis time, prevents device mix-ups and creates a reliable baseline for post-repair testing.
Privacy matters too. Apple tells customers not to give repair technicians their Apple Account password, device passcode or other account-security information. Meanwhile, Samsung and Google provide repair-specific modes or preparation processes designed to protect customer information during servicing.
Ultimately, the goal is simple: know exactly what arrived before the repair begins.
Why repair intake matters more than the repair ticket
Many shops treat check-in as an administrative step.
For example, the customer gives their name, says “screen broken”, receives a ticket and leaves.
However, that approach misses valuable information.
The repair technician receives an incomplete story
A cracked screen could arrive with:
- a weak battery;
- a faulty microphone;
- Face ID that already does not work;
- a damaged charging port;
- a bent frame;
- camera problems;
- previous repair history.
If nobody records those issues at intake, the customer and shop may later disagree about when the fault appeared.
Therefore, a consistent intake process creates a baseline before anybody opens the device.
What should a phone repair intake checklist contain?
A good checklist captures enough information to identify the device, reproduce the problem and document its starting condition.
However, it should not become a 30-minute interrogation for every cracked screen.
The best intake process is proportionate
For instance, a straightforward repair may only need a fast inspection and standard diagnostic workflow.
By contrast, a water-damaged, heavily repaired or high-value flagship deserves more detailed documentation.
Therefore, the following 30 checks can be adapted to the type of repair your business performs.
1. Record the customer’s identity and contact details
Start with the basics.
Record the customer’s name and a reliable contact method.
Make sure the contact details actually work
A repair can stall for days if the technician discovers another fault but cannot reach the customer for authorisation.
Depending on your workflow, record an appropriate:
- phone number;
- email address;
- business contact;
- repair reference number.
In addition, a unique repair reference helps prevent confusion when one customer brings several devices.
2. Record the manufacturer and exact model
“Samsung Galaxy” is not enough.
Likewise, “iPhone Pro” is too vague.
Identify the exact handset
Parts, repair procedures and internal layouts differ between models that look almost identical externally.
Therefore, where possible, capture the full device model before ordering parts or quoting complex work.
3. Record the IMEI or serial number
The IMEI or serial number gives the repair job a unique device identity.
That becomes especially useful when several identical black iPhones or Galaxy devices sit in the same workshop.
Device identity reduces mix-ups
Depending on the handset, the identifier may be available through Settings, the original packaging or the device itself.
Instead of relying on handwritten descriptions such as “black iPhone 16”, record an exact identifier.
As a result, the repair receives a much stronger audit trail.
4. Confirm the storage and important device variant
Model name alone does not always identify the full configuration.
Therefore, capture relevant details such as storage capacity and regional or network variant where they matter to repair or replacement.
This becomes especially important during replacement
If a board-level failure later leads to replacement rather than repair, accurate specifications help prevent the wrong device from being ordered or returned.
5. Record the colour
Colour sounds trivial until several otherwise identical devices enter the same queue.
It also helps document exactly what the customer handed over.
Use identifiers together
For example, a good record might contain:
iPhone 17 Pro · 256GB · black · IMEI ending 4271.
That is considerably more useful than “customer’s iPhone”.
6. Record the customer’s reported fault in their own words
Do not immediately translate every customer description into your diagnosis.
For example, if the customer says, “It stops charging unless I hold the cable upwards,” record that symptom.
Symptoms and diagnoses are different
“Charging-port replacement required” is already a diagnosis.
However, the actual problem could be:
- port contamination;
- a damaged cable;
- a worn connector;
- battery behaviour;
- charging circuitry.
Therefore, record what the customer experiences first. Diagnose the cause afterwards.
7. Ask when the fault started
Timing can reveal useful clues.
For instance, a fault that appeared immediately after a drop differs from one that developed slowly over six months.
Ask about the trigger
Useful context might include:
- a fall;
- water exposure;
- a software update;
- a previous repair;
- gradual battery decline;
- a new charger or accessory.
Consequently, this information can shorten diagnosis considerably.
8. Ask whether the phone has been repaired before
Previous work can change the risk of the current job.
For example, a phone may already contain replacement parts, missing screws, damaged seals or altered internal components.
Previous repair history changes expectations
Ask what was repaired and, where known, who completed the work.
On supported iPhones, Parts and Service History may provide additional information about replaced components.
In relevant circumstances, Apple currently displays labels such as Genuine, Used, Unknown and Unverified.
9. Check for unfinished iPhone repairs
This has become particularly important on newer iPhones.
Apple’s current Parts and Service History system can display Finish Repair when a replacement part still requires completion through Repair Assistant.
Finish Repair can affect functionality
According to Apple, some replaced components may not perform fully until the calibration process has completed.
Furthermore, certain biometric functions such as Face ID or Touch ID may remain unavailable until the repair is finished.
Therefore, a repair shop should identify an unfinished previous repair before assuming the new job caused the problem.
10. Photograph the front of the device
A quick intake photograph can prevent a lengthy argument later.
Ideally, capture the condition of the front glass and display before work starts.
Photographs are especially useful for damaged devices
Record visible:
- cracks;
- chips;
- deep scratches;
- impact marks;
- screen lifting;
- missing glass.
Importantly, the photograph should be linked to the repair record rather than left on an employee’s personal phone.
11. Photograph the rear and frame
The front is only half the device.
For example, a dented frame can affect how a replacement display fits, while cracked rear glass can complicate handling.
Capture the corners too
Corner impact damage often indicates the direction and severity of a previous drop.
Consequently, that information can become relevant if the technician later discovers internal damage.
12. Look for chassis distortion
A bent phone increases repair risk.
In particular, a replacement screen may not sit correctly against a distorted frame.
Do not discover the bend after fitting the part
Inspect the handset from several angles before repair.
If the frame appears distorted, document it and explain the implication to the customer before proceeding.
13. Check for screen lifting or battery swelling
A raised screen does not always mean the adhesive simply failed.
Instead, an expanding battery can push the display away from the frame.
Record what you see
Photograph visible lifting and note it on the repair record.
As a result, the shop has clear evidence if the customer originally believed they only needed a display-adhesive repair.
14. Check for obvious liquid exposure
Ask whether the phone has recently been wet.
In addition, inspect for obvious signs such as moisture around ports, camera condensation or corrosion.
A working phone can still have liquid damage
Liquid-related corrosion can develop after the initial exposure.
Therefore, a handset that powers on at intake should not automatically be treated as free from water damage.
If liquid damage is suspected, make sure the repair quote reflects that uncertainty.
15. Record the condition of the charging port
The charging connector is easy to overlook during an unrelated repair.
Yet customers often notice charging problems immediately after collecting their phone.
Check before opening the handset
Inspect for:
- lint;
- corrosion;
- bent contacts;
- loose connection;
- visible damage.
If the port already behaves intermittently, record that behaviour before the repair starts.
16. Test the display before repair where possible
A broken front glass does not necessarily mean the LCD or OLED panel is fully functional.
Therefore, if enough of the display works, check it before replacing anything.
Look for more than cracks
Check for:
- dead pixels;
- lines;
- burn-in;
- brightness problems;
- colour problems;
- flickering.
The original display fault should form part of the repair baseline.
17. Test touchscreen response
A damaged display may still produce an image while parts of the touchscreen fail.
Where possible, run touch input across the available display area.
Record dead areas separately
This helps the technician determine whether the new screen resolves the original problem.
In addition, it provides useful evidence when comparing pre- and post-repair results.
18. Test cameras
A screen repair can involve working close to cameras and sensors.
Therefore, testing them beforehand gives the technician a valuable baseline.
Do not test only the main camera
Where practical, test:
- front camera;
- main rear camera;
- ultra-wide;
- telephoto;
- autofocus;
- flash.
Also record any pre-existing focus, vibration, dust or image-quality problem.
19. Test speakers and microphones
Audio faults can easily be missed during visual intake.
Moreover, they can create common “it worked before” disputes.
Check multiple audio paths
Where relevant, test the earpiece, loudspeaker and microphones independently.
A phone call alone, for example, may not exercise every microphone or speaker.
20. Test buttons and biometric functions
Check physical controls and authentication features before repair where practical.
Useful checks include:
- power button;
- volume controls;
- action or mute controls;
- fingerprint sensor;
- Face ID or equivalent face authentication.
Importantly, a damaged frame or previous repair may already have affected these functions.
21. Test connectivity where relevant
Not every screen replacement needs a ten-minute network audit.
However, complex repairs benefit from a broader baseline.
Depending on the job, consider:
- Wi-Fi;
- Bluetooth;
- USB connectivity;
- mobile network;
- NFC.
For board-level repairs or water-damaged devices, these checks become considerably more important.
22. Check account and activation status
A technician can repair the hardware perfectly and still end up with a device that cannot complete normal setup.
Apple Activation Lock and Android Factory Reset Protection are common examples.
Know the account situation before destructive work
If the repair may require resetting or replacing major components, establish what account restrictions exist before work begins.
Otherwise, the technician may discover an unresolved lock only after completing an expensive repair.
23. Protect customer privacy
Customer phones can contain photographs, messages, banking apps, work documents, authentication codes and other sensitive information.
Therefore, repair intake should minimise unnecessary access.
Apple explicitly tells users not to share passwords
Apple’s current service guidance says customers should never give anybody their Apple Account password, device passcode or account-security details.
Where software support requires the customer to enter credentials, Apple says the customer should remain present while the technician has access.
Likewise, independent shops should take the same privacy concern seriously.
24. Use Samsung Maintenance Mode where appropriate
Samsung provides Maintenance Mode on supported Galaxy devices.
The feature creates a separate environment for repair access while helping keep the owner’s personal information private.
This is better than casually asking for full access
Where Maintenance Mode supports the diagnostic work required, it gives technicians an environment designed for servicing without exposing the customer’s normal account.
Nevertheless, customers should still back up important data before repair.
25. Use Pixel Repair Mode where supported
Google provides a similar Repair Mode for eligible Pixel devices.
According to Google, the mode starts a clean Android environment in a dedicated secure partition with limited functions.
Technicians do not need the customer’s PIN
Google explicitly tells customers not to share their PIN, password or pattern with the technician.
In addition, the company recommends backing up the device before service because some repairs may still require data deletion.
Repair Mode is therefore useful, but it is not a substitute for backup.
26. Record accessories left with the device
A case, SIM tray, stylus or charger can generate a dispute just as easily as the phone itself.
Therefore, record anything the customer leaves behind.
Do not accept unnecessary accessories
If the charger has nothing to do with a cracked-screen repair, there may be no reason to store it.
Similarly, Samsung’s repair guidance tells customers to remove accessories unrelated to the repair.
The fewer unnecessary items you accept, the fewer things you can lose.
27. Agree the repair scope before starting
“Fix my phone” is too vague.
Instead, define what the customer is authorising.
Examples include:
- replace cracked display;
- diagnose no-power fault;
- replace battery;
- clean charging port;
- investigate liquid damage;
- attempt data recovery.
Furthermore, diagnostic work and repair authorisation should be distinguished where relevant.
28. Agree how additional faults will be handled
A technician may discover more damage after opening the phone.
Therefore, decide in advance what happens next.
Set an authorisation rule
For example, the intake process might say:
“Contact customer before any additional work above the agreed quote.”
As a result, a technically successful repair is less likely to become a billing dispute.
29. Record the estimated price and limitations
A quotation should explain what the shop expects to do and what could change the price.
Complex faults need conditional estimates
A cracked display is relatively predictable.
By contrast, liquid damage and board-level faults often are not.
If further diagnosis may change the cost, make that clear before accepting the device.
30. Create a pre-repair diagnostic baseline
The strongest intake process ends with evidence of what worked before repair.
However, that does not mean manually spending 15 minutes testing every low-value job.
Use a repeatable diagnostic workflow
The objective is to test relevant functions consistently enough that the post-repair result can be compared with the starting condition.
For example, before a screen repair you may capture:
- display status;
- touch;
- buttons;
- cameras;
- speakers;
- microphones;
- sensors;
- connectivity.
After repair, repeat the relevant checks.
Consequently, “we tested it” becomes actual evidence.
Why pre-repair testing protects the repair shop
Imagine a customer brings in an iPhone with a cracked display.
The technician replaces the screen successfully.
At collection, however, the customer discovers that the rear camera will not focus.
Without an intake test, nobody knows when it failed
The customer may genuinely believe the camera worked beforehand.
Meanwhile, the technician may genuinely believe it was already damaged.
Without evidence, neither side can establish the starting condition.
With a baseline, the conversation changes
If the intake record shows that autofocus failed before the phone was opened, the dispute becomes much easier to resolve.
Conversely, if the camera passed before repair and fails afterwards, the shop knows it needs to investigate the repair process.
Why photographs and diagnostics solve different problems
Photographs prove physical condition.
By contrast, diagnostics provide evidence about functional condition.
For higher-risk repairs, you generally need both.
A photograph cannot prove a microphone worked
Likewise, a diagnostic report cannot show that the corner of the frame was already crushed.
Therefore, combining visual evidence with functional results gives the repair record much greater value.
Should shops ask customers for their passcode?
Not as a casual default.
Modern manufacturers increasingly provide ways to support repair diagnostics while limiting access to private information.
Use the least access necessary
Where the device supports Maintenance Mode or Repair Mode and those features meet the diagnostic need, consider them before requesting broad access to the customer’s normal profile.
If a particular repair genuinely requires customer interaction, explain why and handle the process according to your business’s privacy procedures.
Above all, never ask customers for unrelated account passwords.
What if the customer cannot disable Find My?
This can matter for certain Apple service and repair processes.
Apple currently instructs customers preparing an iPhone for service to turn off Find My.
In some circumstances, Apple may be unable to complete service procedures while the feature remains active.
Identify the problem at check-in
Therefore, do not wait until a technician has spent time on the device to discover that an account or activation requirement prevents the next step.
The intake process should surface those blockers early.
What if the phone will not power on?
A dead phone obviously prevents normal diagnostic testing.
As a result, physical documentation becomes even more important.
Record what cannot be tested
For example:
- device does not power on;
- display cannot be assessed;
- touch cannot be assessed;
- cameras not tested;
- biometrics not tested.
Never mark an inaccessible function as “passed”.
Instead, use “not tested” because it is meaningful information.
How much intake testing is enough?
Not every repair needs the same depth.
The correct level depends on the value, fault and risk of the job.
Tier 1: simple repair
A routine screen repair might need a short visual inspection, identity capture and relevant functional checks.
Tier 2: complex repair
A charging fault, camera repair or repeated warranty issue deserves broader diagnostics.
Tier 3: high-risk repair
Liquid damage, board-level work or heavily damaged devices may require detailed photographs, diagnostics and explicit limitations before work starts.
Ultimately, the principle is consistency within each category.
Do not rely on technician memory
A small shop may feel that formal records are unnecessary because the owner handles most repairs personally.
However, that approach becomes unreliable as volume increases.
Memory does not scale
A technician may remember today’s three phones.
Three weeks later, however, they are much less likely to remember the exact microphone condition of one particular handset.
Staff turnover creates another problem too.
If the technician who handled intake is away, another employee should be able to understand exactly what happened from the record alone.
Standardise intake across every employee
Two technicians should not create completely different records for identical repairs.
For example, one employee might photograph every device and test six functions, while another writes “broken screen” and puts it on the bench.
Customers receive different levels of protection
That inconsistency also creates management problems.
Therefore, a defined intake workflow should establish the minimum standard every employee follows.
Training becomes easier as well because staff no longer need to invent their own process.
Use pre-repair and post-repair results together
The most valuable diagnostic record is comparative.
Before repair
First, record what originally passed, failed or could not be tested.
After repair
Next, run the relevant checks again and compare the results.
For example, a successful screen repair might show:
Before: display fail · touch fail · microphone pass · cameras pass · speakers pass.
After: display pass · touch pass · microphone pass · cameras pass · speakers pass.
Now the record clearly demonstrates what changed.
How MobiTEST fits the repair intake process
MobiTEST is designed to make mobile-device diagnostics faster and more consistent.
Its guided workflows can test areas including hardware, display, touchscreen, sound, sensors and connectivity.
Why guided testing matters
Without a workflow, technicians naturally skip tests when the workshop gets busy.
For instance, one member of staff checks Bluetooth while another forgets.
A guided process therefore reduces variation.
In addition, MobiTEST supports retesting and diagnostic reporting, making it useful for comparing device condition before and after repair.
How MobiONE can connect intake with the wider workflow
MobiONE is designed for organisations that need a broader, repeatable device-processing system.
The platform brings together device lookup, diagnostics, grading and workflow controls.
Turn shop knowledge into rules
Customisable workflow rules allow businesses to define how devices move through processing rather than relying entirely on technician judgement.
For example:
- identify device;
- capture intake information;
- run pre-repair diagnostics;
- flag exceptions;
- complete repair;
- run targeted retests;
- record the outcome;
- approve the device for handover.
For multi-site businesses, this consistency becomes particularly valuable.
Where MobiCHECK can fit
A normal customer repair does not necessarily require the same due diligence as purchasing used stock.
However, many repair businesses also operate trade-in, resale or buyback programmes.
Keep repair and purchasing workflows separate
If the business is actually buying the device, MobiCHECK can support professional IMEI and device-status checks.
Depending on available data, that may help identify issues relating to blacklist, lost or stolen status, finance or insurance.
Importantly, that is a different commercial decision from simply repairing a customer’s phone.
Build an intake form technicians will actually use
An intake form fails if it becomes so cumbersome that staff bypass it.
Therefore, the best system makes important information difficult to miss while keeping straightforward repairs fast.
Use conditional fields
For example:
Liquid exposure? If yes, reveal extra corrosion and data-risk questions.
Previous repair? If yes, request repair details.
Device powers on? If no, automatically mark relevant functional tests unavailable.
As a result, the workflow remains detailed without making every job identical.
What should happen at repair handover?
Intake evidence is only half the process.
A professional handover closes the loop.
Before returning the device
Confirm:
- the authorised repair was completed;
- relevant post-repair tests passed;
- any unresolved fault is documented;
- the device condition is recorded;
- customer accessories are present;
- the final price matches the authorised work;
- warranty terms are clear.
Where appropriate, let the customer inspect important functions before leaving.
Keep failed tests visible
Do not delete an awkward result simply because it is unrelated to the repair.
For example, if the customer’s Bluetooth failed before and after a screen replacement, preserve that information.
Transparency protects the business
The final record can show that the screen repair succeeded while an unrelated pre-existing fault remains.
Therefore, the customer receives useful context instead of discovering the issue later with no explanation.
A practical phone repair intake workflow
Stage 1: Identify
- Customer details
- Repair reference
- Make and model
- IMEI or serial
- Storage and colour
Stage 2: Understand the problem
- Customer’s description
- When the problem started
- Drop or liquid history
- Previous repairs
- Required repair outcome
Stage 3: Record condition
- Front photograph
- Rear photograph
- Frame condition
- Cracks and dents
- Screen lifting
- Charging-port condition
Stage 4: Functional baseline
- Display
- Touch
- Buttons
- Cameras
- Audio
- Biometrics
- Connectivity
Stage 5: Privacy and access
- Confirm customer backup where appropriate
- Use repair or maintenance modes where supported
- Avoid unnecessary credential access
- Identify account or activation blockers
Stage 6: Authorisation
- Repair scope
- Price or estimate
- Additional-work approval process
- Known limitations
- Accessories accepted
Stage 7: Repair and quality control
- Complete authorised work
- Run post-repair diagnostics
- Compare against intake results
- Document exceptions
- Complete customer handover
Commercial takeaway
A professional repair intake process is not paperwork for the sake of paperwork.
Instead, it gives the technician better information, gives the customer clearer expectations and gives the business evidence when something goes wrong.
Start with three questions
Every repair record should make it easy to answer:
What device arrived?
What condition was it in?
What worked before we touched it?
Then prove the outcome
After repair, the business should be able to show what changed and which functions passed.
MobiTEST supports guided diagnostics and retesting, while MobiONE can help larger operations standardise device processing across staff and locations.
As a result, phone shops can reduce missed faults, improve technician handovers and create much stronger evidence when customers question the result.
The repair itself may happen at the bench.
However, the quality of the repair process starts at the counter.
A practical example: the customer says Face ID was working before the screen repair
A customer brings in an iPhone with a smashed display.
Although the phone still turns on, the upper section of the glass is badly damaged.
A weak intake process
The employee writes:
“Replace screen — £X.”
Next, the technician fits the new display.
At collection, the customer tries Face ID and discovers it does not work.
According to the customer, the repair broke it.
Meanwhile, the technician believes the original impact caused the problem.
Unfortunately, nobody can prove either position.
A stronger intake process
Now imagine the same repair with structured check-in.
First, the employee records the IMEI and physical damage. They then take intake photographs and run the available diagnostic checks.
Before the phone enters the workshop, Face ID already fails.
That result is attached to the repair record.
The repair proceeds with clear expectations
The customer is told that the screen can be replaced, but Face ID already fails and is not included in the screen-replacement quote.
Afterwards, the new display and touch functions pass.
Face ID still fails, exactly as recorded before the repair.
The intake process prevented the dispute
The screen repair did not become technically better because somebody completed a form.
However, the overall service became considerably better.
The customer understood the device condition before work started, the technician knew the repair scope and the business had evidence supporting the outcome.
Ultimately, that is what a good phone repair intake process should achieve.
Frequently asked questions
Phone repair intake questions
What should a phone repair shop record at intake?
A repair shop should record the device identity, make and model, IMEI or serial number, customer-reported fault, visible condition, previous repairs, relevant accessories and appropriate pre-repair functional test results. In addition, photographs can provide useful evidence of physical condition.
Should repair shops take photos before opening a phone?
Yes, particularly for damaged or high-value devices. Photographs can document cracks, dents, frame damage, screen lifting and other visible pre-existing damage. However, they should complement functional diagnostics because photographs cannot prove whether functions such as microphones or cameras worked.
Should a phone repair shop record the IMEI?
Yes. Recording an IMEI or serial number gives the repair an exact device identifier and, therefore, reduces the risk of confusion when several identical models are being processed.
Should a phone be tested before repair?
Where the device condition allows it, pre-repair testing creates a functional baseline. Afterwards, relevant tests can be repeated to show what changed and identify unrelated pre-existing faults.
Privacy and diagnostics questions
Should customers give repair shops their phone password?
Shops should avoid requesting unnecessary credentials. Apple explicitly tells users not to give service technicians their Apple Account password or device passcode. Meanwhile, supported Samsung and Pixel devices provide repair-specific modes designed to protect private customer information.
What is Samsung Maintenance Mode?
Maintenance Mode creates a separate environment on supported Samsung devices. As a result, technicians can perform relevant repair work while limiting access to the owner’s normal personal data.
What is Google Pixel Repair Mode?
Repair Mode starts a clean Android environment in a dedicated secure partition on eligible Pixel devices. Therefore, technicians can service supported devices while helping protect the owner’s personal information.
How can repair shops standardise pre- and post-repair testing?
A guided diagnostic workflow helps staff run the same relevant checks on every device. For example, MobiTEST supports guided diagnostics, retesting and reporting, while MobiONE can apply broader device-processing workflows across teams and locations.
References and further reading
- Apple Support — Prepare your iPhone or iPad for a service appointment
- Apple Support — iPhone Parts and Service History
- Apple Support — Apple Service and Repair
- Samsung Support — How to get your mobile device repaired
- Samsung Support — Maintenance Mode and device preparation for service
- Google Pixel Help — Use Repair Mode for repair services
- Google Pixel Help — Get ready to start a repair
- MobiCode — MobiTEST
- MobiCode — MobiONE
- MobiCode — MobiCHECK